Floor laying and maintenance
Please note the following product precautions before use
1. Do not leave the product exposed to direct sunlight for extended periods of time.
2. Please store the product indoors below 40°C to maintain its quality.
3. This product is for indoor use only. Do not use in outdoor, commercial kitchen or food processing areas or heavy industrial areas.
Pre-installation preparations:
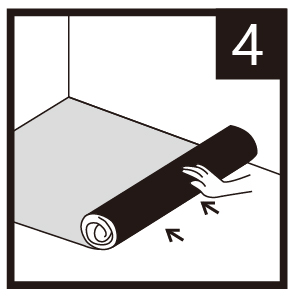
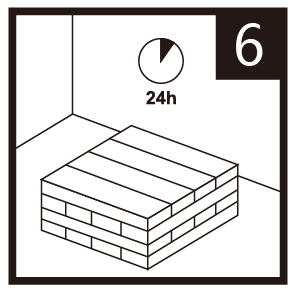
1. The product must be placed flat on the ground at room temperature for at least 24 hours. Boxes must be stacked in neat layers to eliminate any bending or warpage due to bundling (packaging).
2. Handle with care during transportation. Do not throw the product as it may damage the corners of the flooring and impact on product quality.
3. Inspection of the existing floor:
A. The original floor must be clean, dry, flat, solid and completely free of dust.
B. If the original floor is tiled or marble, the seams should be leveled with grout or cement.
C. If the original floor is timber, it must have a thickness of at least 12 mm and be free of any bending, warpage, or cracks. Nail heads should be sunk into the timber.
D. We strongly recommend against the use of this flooring product if the original floor is concrete that is sandy or bumpy or tiles with uneven surfaces.Please contact a professional installer to find a more appropriate flooring material.
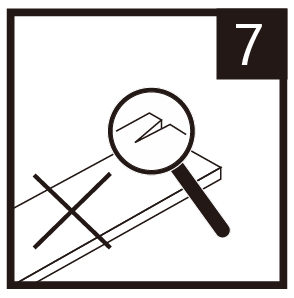
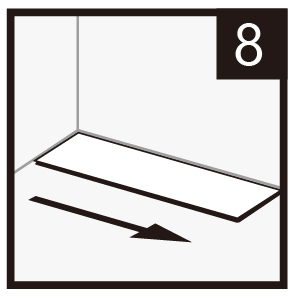
4. Please check the product number at the time of purchase to ensure that all of the flooring is of the same color pattern.The quantity purchased should be sufficient to complete the project.There may be minor variations in color between different batches of the product with the same color pattern. The underside of the flooring is marked with an arrow to show the preferred laying direction. These should be inspected before laying.
Installation tips:
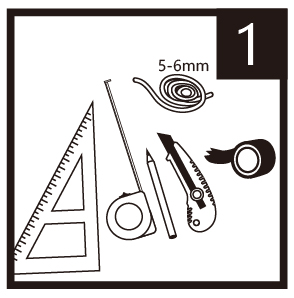
1. Tools (1) Craft knife, Hacksaw, ink line marker, laser level, pointed trowel, blow torch, rubber mallet.
2. Inspection
(1) Verify that the ground surface is level and ready for the vinyl flooring to be laid.
(2) Verify that the concrete surface is dry. If the base layer is cement plastering then it must be allowed to dry for at least 14 days.
If it is concrete then it must be allowed to dry for at least 28 days.
(3) How to check dryness:
a. Heat a single location with the blowtorch. If a halo of moisture can be seen then it is not ready for laying.
b. Place a rolled up newspaper on the ground and light it up to heat the concrete. If the above phenomenon appears, it is not ready for laying either.
c. Test with a moisture meter. Do not lay if moisture content is over 8%.
d. Spread a piece of newspaper over the concrete then place the flooring over the newspaper. Wait 3 days then try to light up the newspaper. Do not lay if the newspaper cannot be ignited.
(4) The base layer should show no signs of alkalization, carbonization, and sandiness.
3. Preparations
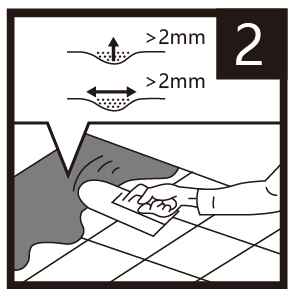
(1) Grind away bumps in the ground then fill and level any depressions, cracks, seams, and holes with plaster and water mixed with PVC resin.
(2) Larger holes should be filled with cement mortar or cement aggregate before the area is leveled with plaster/PVC resin leveling compound.
(3) Use the trowel to flatten and smoothen out the filler until a smooth, flat and solid surface is achieved.
(4) Keep off the surface until the filler has dried (about 25 minute).
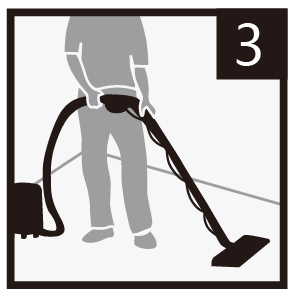
(5) Sweep the surface to ensure proper adhesion for vinyl flooring. (6) Any damp spots in the ground should be baked with the blow torch then allowed to cool for 30 minutes before laying.
4. Setting out
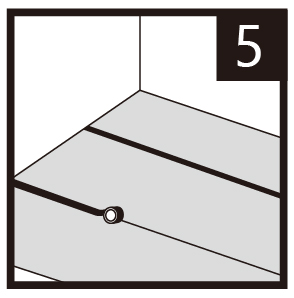
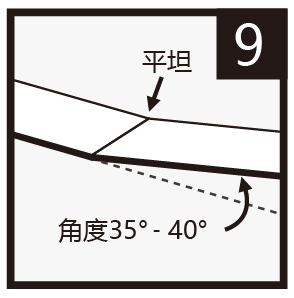
(1) Use ink lines from the building base line to find the center point of the space. Now use the set square or geometry to derive the vertical bisector, then use the ink line marker to mark two perpendicular base lines.
(2) For the Diagonal pattern, establish the hypothetical baseline for the diagonal at the center of the room. Use the set square to find the 45-degree angle, then use the ink line marker to mark out the diagonal base lines.
5. Laying
(1) Clean the ground of all dust and filler residue.
(2) Use a serrated scraper (teeth width <=1 mm, teeth height 2mm, teeth pitch 4.5 mm) to apply the PVC adhesive evenly over the work surface (creating a wavy pattern) with no clumping. Spread in all directions along the baseline. Apply approximately 0.2 ~ 0.3 kg per square meter. The curing time is shown in the table below:
Floor Type Standard Application per Ping (3.3m2) Time between Application and Laying Concrete 0.2 ~ 0.3 kg 10 ~ 15 mins
Timber flooring 0.15 ~ 0.25 kg 20 ~40 mins Wait for the adhesive to turn opaque and tacky before laying.
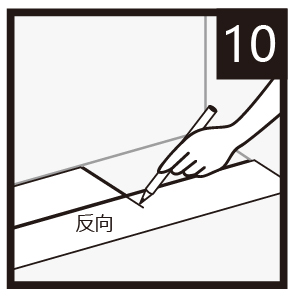
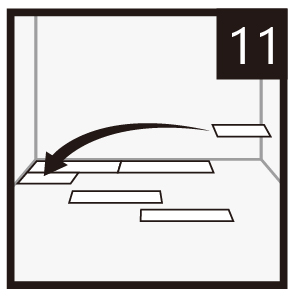
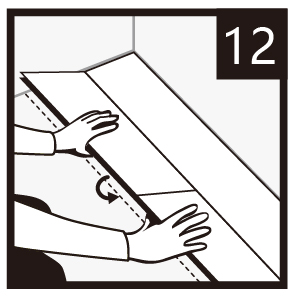
(3) Lay the flooring in accordance with the construction drawings. Flooring should be laid with the pattern all aligned in the same direction. They should be also be laid so that both edges are the same distance from the walls.
(4) Excess adhesive should be cleaned up immediately with a mix of kerosene and vinegar, or with turpentine, then wiped off with a clean, damp cloth.
(5) If there is poor adhesion in parts due to weather or other factors, these areas can be warmed with the blowtorch to improve adhesion.
Maintenance:
Appropriate cleaning and maintenance can extend the service life of the flooring and keep your home looking appealing.
1. Check each piece of flooring after laying to ensure that it is properly attached to the ground.Marks left during construction can be removed with “liquid wax or floor wax” afterwards (under no circumstances should alcohol or ether-based cleaners (e.g. kerosene) should be used). This can be used to maintain the surface of the flooring as well.Do not allow the floor to be affected by damp within seven days of being laid.
2. For routine cleaning, sweep up any dust or sand with a broom, then “wipe down” with a cloth or mop. A suitable amount of “liquid wax or floor wax” can also be added for enhanced cleaning and maintenance. Just avoid using too much water.
3. Protectors should be placed where there is contact with conical surfaces (e.g. furniture feet) to protect the flooring surface and extend its service life.